The Roubo workbench‚ rooted in French tradition‚ offers unmatched simplicity and durability․ Its PDF plans provide precise guidance‚ making it accessible to both professionals and DIY enthusiasts alike․
1․1 History and Evolution of the Roubo Workbench
The Roubo workbench‚ named after French cabinetmaker André Jacob Roubo‚ traces its origins to the 18th century․ Roubo documented this design in his influential book L’Art du Menuisier‚ popularizing it among woodworkers․ While similar benches existed before‚ Roubo’s detailed plans made it widely adopted․ Over time‚ the design evolved‚ with modern woodworkers adapting it to suit contemporary needs․ The split-top variation emerged in the 21st century‚ offering enhanced versatility․ Today‚ the Roubo workbench remains a cornerstone of traditional woodworking‚ cherished for its simplicity‚ strength‚ and functionality․ Its enduring appeal lies in its ability to blend historical craftsmanship with practical‚ modern applications․
1․2 Importance of Using PDF Plans for Accuracy
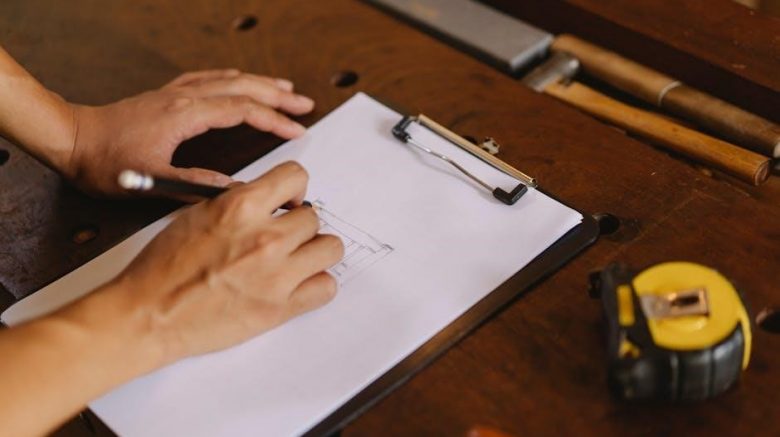
Using PDF plans for the Roubo workbench ensures precision and clarity‚ essential for a successful build․ These plans provide detailed measurements‚ diagrams‚ and step-by-step instructions‚ minimizing errors․ Unlike handwritten or verbal guidance‚ PDFs offer a consistent and reliable format‚ guaranteeing accuracy․ They are particularly beneficial for beginners‚ as they eliminate guesswork and ensure all components fit together seamlessly․ Additionally‚ PDF plans are easily accessible and printable‚ allowing woodworkers to reference them repeatedly without degradation․ This level of detail is crucial for constructing a sturdy‚ functional workbench that meets the original Roubo design’s standards․ By following these plans‚ builders can achieve professional-grade results‚ ensuring their workbench withstands the demands of woodworking for years to come․

Design and Layout of the Roubo Workbench
The Roubo workbench features a robust‚ minimalist design with a thick‚ solid top and legs‚ ensuring stability and versatility for various woodworking tasks‚ as detailed in PDF plans․
2․1 Key Features of the Traditional Roubo Design
The traditional Roubo workbench is renowned for its robust and practical design‚ emphasizing simplicity and durability․ Its key features include a thick‚ solid wood top and legs‚ typically 5 inches thick‚ which provide exceptional stability and resistance to wear․ The design avoids complex joinery‚ relying instead on straightforward construction methods that prioritize strength over aesthetics․ The absence of joists or aprons allows for a clean‚ unobstructed workspace‚ making it ideal for both hand tool and power tool workflows․ Additionally‚ the Roubo design often incorporates a flat‚ even surface that supports precise clamping and work-holding‚ essential for accurate woodworking tasks․ These features‚ combined with the use of high-quality‚ construction-grade lumber‚ ensure the workbench remains a durable and reliable centerpiece in any workshop․
2․2 Understanding the Split-Top Roubo Variation
The Split-Top Roubo workbench is a popular variation of the traditional design‚ offering enhanced flexibility for work-holding and clamping․ This design features a work surface divided into two separate sections‚ allowing for easier integration of vises and workholding accessories․ The split-top design does not compromise the bench’s stability‚ as it retains the thick‚ solid wood construction that the Roubo is known for․ This variation is particularly favored by woodworkers who need a bench that can adapt to various projects‚ as it provides more options for securing workpieces of different sizes and shapes․ While it introduces some complexity in construction‚ the split-top Roubo remains true to the original design’s principles of durability and functionality‚ making it a versatile choice for modern workshops․
Choosing the Best Materials for Your Workbench
Selecting durable materials is crucial for a sturdy workbench․ Construction-grade lumber and solid hardwoods like oak or maple are ideal for strength and long-lasting performance․
3․1 Recommended Wood Types for Durability
For a sturdy Roubo workbench‚ hardwoods like oak and maple are top choices due to their density and resistance to wear․ These woods withstand heavy use and maintain stability over time․ Ash and beech are also excellent options‚ offering strength and durability for demanding woodworking tasks․ Softwoods‚ while less expensive‚ lack the longevity and resilience of hardwoods‚ making them less ideal for a workbench that needs to endure․ Properly drying and sealing the wood ensures it remains resistant to warping and moisture damage․ While hardwoods may be pricier upfront‚ their durability ensures long-term value‚ making them a smart investment for your Roubo workbench․
3․2 Considerations for Construction-Grade Lumber
Construction-grade lumber is a practical choice for building a Roubo workbench‚ offering a balance of affordability and strength․ While it may contain imperfections like knots or warping‚ these can often be worked around during construction․ Proper drying and sealing of the lumber are crucial to prevent warping and ensure longevity; Look for boards that are straight and free of significant cracks‚ as these will provide the most stability․ Although construction-grade lumber may not have the refined appearance of premium wood‚ it is more than sufficient for a functional workbench․ With proper preparation and care‚ it will hold up well to the demands of woodworking․ This cost-effective option allows you to allocate resources to other critical components‚ like vises or accessories‚ without compromising on durability․

Construction Process of the Roubo Workbench
Follow detailed PDF plans to ensure accuracy․ Start by preparing materials‚ then construct the base‚ and finally assemble the top and legs with precision․
4․1 Step-by-Step Guide to Building the Base
Begin by selecting construction-grade lumber for the base‚ ensuring durability and stability․ Cut the legs and stretchers to the specified dimensions using precise measurements․ Assemble the base frame using mortise and tenon joints‚ ensuring a sturdy foundation․ Clamp the components securely while gluing and fitting them together․ Allow the glue to set completely before moving on․ Use a level to ensure the base is perfectly aligned and stable․ Reinforce the joints with drawbore pins for added strength․ Sand all surfaces to smooth out any rough edges or splinters․ Finally‚ inspect the base for squareness and structural integrity before proceeding to assemble the workbench top․
4․2 Assembling the Workbench Top and Legs
Attach the workbench top to the base using screws and wood glue for maximum stability․ Ensure the top is evenly spaced and aligned with the base frame․ For the split-top variation‚ align the two halves carefully and secure them with hinges or bolts․ Fit the legs to the top using mortise and tenon or drawbore joints‚ ensuring a snug and rigid connection․ Clamp all components firmly while the adhesive sets․ Use a square to verify proper alignment and tighten all joints securely․ Allow the assembly to cure fully before sanding and finishing․ This step ensures a rock-solid foundation for your workbench‚ ready to withstand heavy use and provide years of reliable service․
Customizing Your Roubo Workbench
Personalize your Roubo workbench with design modifications and accessories like vises‚ ensuring it meets your specific woodworking needs for optimal functionality and efficiency․
5․1 Design Modifications for Specific Needs
Customizing your Roubo workbench involves tailoring its design to suit specific woodworking tasks․ For instance‚ adding a split top allows for versatile clamping options‚ while extending the length or width can accommodate larger projects․ Some woodworkers opt for angled legs to enhance stability on uneven floors‚ while others integrate tool trays or shelves for better organization․ Modifications can also include adding a built-in vise or incorporating storage compartments․ These adjustments ensure the workbench becomes a highly personalized tool‚ catering to individual preferences and workshop requirements․ By making thoughtful design changes‚ you can enhance functionality and streamline your workflow‚ making the Roubo workbench even more indispensable in your woodworking journey․
5․2 Adding Vises and Work-Holding Accessories
Enhancing your Roubo workbench with vises and work-holding accessories significantly improves its functionality․ A leg vise‚ often positioned at the end of the bench‚ provides robust clamping for various projects‚ while a tail vise allows for precise control over workpieces․ Accessories like bench dogs‚ hold-downs‚ and planing stops further expand the bench’s versatility․ These additions enable secure clamping of diverse materials and shapes‚ catering to specific woodworking needs․ When installing vises and accessories‚ careful planning ensures seamless integration with the bench’s design․ By incorporating these elements‚ you can tailor your workbench to handle a wide range of tasks efficiently‚ making it an indispensable tool in your workshop․
Resources and Plans for the Roubo Workbench
Explore comprehensive guides‚ detailed PDF plans‚ and inspiring projects for the Roubo workbench online․ Discover books‚ forums‚ and woodworking communities that offer expert advice and creative modifications․
6․1 Where to Find Reliable Roubo Workbench PDF Plans
Reliable Roubo workbench PDF plans can be found in woodworking books‚ forums‚ and dedicated woodworking websites․ The Spruce Crafts and Instructables offer detailed guides‚ while forums like Reddit’s r/woodworking provide community-shared plans․ Additionally‚ websites such as Fine Woodworking and Woodcraft often feature downloadable Roubo-inspired designs․ For a more traditional approach‚ books like “The Anarchist’s Workbench” by Christopher Schwarz include comprehensive plans and modifications․ Always verify the source’s credibility and check for reviews to ensure the plans are accurate and well-detailed․ Many creators also share their plans on platforms like Etsy or personal blogs‚ offering customizable options․ These resources cater to both beginners and experienced woodworkers‚ ensuring a smooth building process․
6․2 Additional Tools and Resources for Success
Beyond PDF plans‚ having the right tools ensures a smooth build․ A marking gauge‚ clamps‚ and hand planes are essential for precise joints and a flat top․ For drilling and driving‚ a brace and bit or cordless drill is recommended․ Chisel sets and sharpening tools are crucial for fine-tuning joints․ Winding sticks help ensure the bench is square․ Online communities like Reddit’s r/woodworking and forums offer tips and troubleshooting․ Video tutorials from sources like The Spruce Crafts and Fine Woodworking provide visual guidance․ Books such as “The Anarchist’s Workbench” by Christopher Schwarz offer deeper insights․ Finally‚ 3D modeling software‚ like eDrawings‚ allows you to visualize your design before cutting wood․ These resources and tools collectively enhance your ability to build a sturdy‚ functional Roubo workbench tailored to your needs․