
Label the Skeleton Worksheet PDF is an interactive learning tool designed to help students engage with human anatomy․ It allows users to identify and name major bones, promoting a deeper understanding of the skeletal system․ These worksheets are ideal for educational purposes, enabling self-testing and reinforcing visual learning․
Importance of Skeletal System Worksheets

Skeletal system worksheets are essential tools for anatomy education, offering interactive and visual learning experiences․ They help students identify and understand the structure of bones, fostering a strong foundation in human anatomy․ By labeling diagrams, learners develop spatial awareness and retention of complex bone names․ These exercises also enhance problem-solving skills and scientific terminology usage․ Worksheets are particularly beneficial for visual learners, as they provide a hands-on approach to studying the skeletal system․ Regular practice with such exercises improves understanding of bone functions and their roles in the body․ Additionally, they prepare students for advanced studies in medicine, biology, and related fields․ Overall, skeletal system worksheets are vital for engaging and effective anatomy education․

Overview of Labeling Exercises in Anatomy Education
Labeling exercises are a cornerstone of anatomy education, providing students with an interactive way to learn complex structures․ These exercises require learners to identify and name specific parts of diagrams, fostering active engagement and deeper understanding․ By focusing on skeletal anatomy, students develop spatial awareness and improve their ability to recognize bone structures․ Labeling exercises also enhance problem-solving skills, as they encourage critical thinking and attention to detail․ Additionally, they reinforce the use of scientific terminology, preparing students for advanced studies in medicine and biology․ Regular practice with labeling exercises helps build confidence and ensures a strong foundation in human anatomy, making them an indispensable tool for educators and learners alike․

Types of Skeleton Worksheets
Skeleton worksheets vary, offering axial and appendicular skeleton labeling exercises․ They include upper limb, lower limb, and skull bones, as well as surface markings and specific bone parts identification․

Axial Skeleton Labeling
The axial skeleton includes the bones of the skull, spine, ribs, and sternum․ Labeling exercises focus on identifying these structures, such as the cranium, facial bones, vertebrae, and ribcage․ These worksheets help students understand the axial skeleton’s role in protecting vital organs and supporting the body․ Detailed diagrams provide clear visuals, while fill-in-the-blank exercises reinforce memorization․ Common features include numbered sections for skulls and ribcages, ensuring accurate identification․ These tools are essential for anatomy students to master the complex structures of the axial skeleton effectively․
Appendicular Skeleton Labeling
The appendicular skeleton consists of the upper and lower limb bones, shoulders, hips, and pelvic girdles․ Labeling exercises in worksheets focus on identifying bones like the humerus, radius, ulna, femur, tibia, and fibula․ These activities help students understand how the appendicular skeleton facilitates movement and connects to the axial skeleton․ Worksheets often include diagrams of arms and legs with blank spaces for bone names, promoting active learning․ Interactive PDFs allow students to engage with the material digitally, enhancing retention․ By mastering appendicular labeling, students gain a comprehensive understanding of the skeletal system’s structure and function․
Major Bones of the Human Skeleton
The human skeleton comprises 206 bones, including the skull, spine, ribs, sternum, and hyoid․ Major bones like the humerus, radius, ulna, femur, tibia, fibula, pelvis, and sacrum form the framework․ Worksheets help students identify and understand their structure and functions, enhancing anatomical knowledge through interactive exercises․
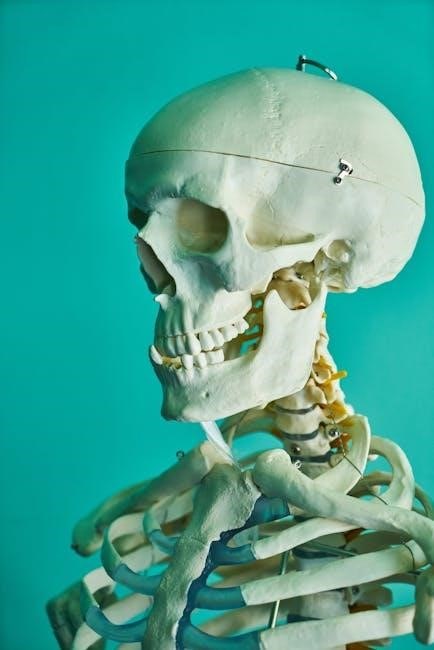
Skull and Facial Bones
The skull and facial bones form the foundation of the human skeleton, providing structural support and protection for vital organs like the brain․ The skull consists of 22 bones, with 8 bones forming the cranium and 14 bones making up the face․ Key bones include the frontal bone, maxilla, zygoma, and mandible․ Worksheets often feature labeled diagrams of these bones, helping students identify and understand their locations and functions․ The mandible, or lower jawbone, is the only movable bone in the skull, while the hyoid bone supports swallowing and speech․ Labeling exercises emphasize distinguishing between cranial and facial bones, as well as recognizing their roles in facial structure and movement․ These activities are essential for anatomy education, enabling students to grasp the complexity of the skull and its significance in human anatomy․
Upper Limb Bones
The upper limb bones include the humerus, radius, ulna, carpals, metacarpals, and phalanges․ The humerus, the longest bone in the upper limb, connects the shoulder to the elbow․ The radius and ulna form the forearm, with the radius responsible for wrist rotation․ The carpals are eight small bones in the wrist, while the metacarpals connect the wrist to the fingers․ Phalanges are the finger bones, with each finger containing three phalanges except the thumb, which has two․ Labeling worksheets often highlight these bones to help students understand their roles in movement and flexibility․ Identifying these bones is crucial for grasping upper limb anatomy, as they work together to enable a wide range of motions, from simple gestures to complex actions․
Lower Limb Bones
The lower limb bones consist of the femur, patella, tibia, fibula, tarsals, metatarsals, and phalanges․ The femur, the longest and strongest bone, connects the hip to the knee․ The patella, or kneecap, protects the knee joint․ The tibia and fibula form the shin, with the tibia supporting most of the body’s weight․ The tarsals, metatarsals, and phalanges make up the foot and toes․ Labeling these bones helps students understand their roles in movement and support․ Worksheets often emphasize these bones to highlight their functions in walking, running, and balance․ Accurate identification is essential for comprehending lower limb anatomy and its role in mobility․

Surface Markings and Bone Parts
Surface markings and bone parts are essential for identifying anatomical features․ Labeling exercises highlight structures like condyles, epicondyles, and malleoli, aiding in understanding bone function and structure․
Identifying Bone Surfaces and Features

Identifying bone surfaces and features is crucial for understanding skeletal anatomy․ Labeling exercises highlight key structures like condyles, epicondyles, and malleoli, which are vital for joint movement and muscle attachment․ Students learn to recognize surface markings such as trochanters, spinous processes, and iliac crests, which serve as attachment points for muscles and ligaments․ Features like foramina and fossae are also emphasized, as they relate to nerve passages and joint articulations․ By labeling these details, learners develop a deeper appreciation for how bones function individually and collectively․ These exercises are particularly useful for visual learners, as they provide a hands-on approach to mastering complex anatomical terminology․ This skill is essential for both students and professionals in fields like medicine and physical therapy․

Practical Tips for Using Labeling Worksheets
Use blank diagrams for self-testing and color-code bones for better retention․ Start with major bones and gradually include details for comprehensive understanding․
How to Create Effective Labeling Exercises
Creating effective labeling exercises involves using clear diagrams and organizing content logically․ Start with blank skeletons or bone illustrations, ensuring labels are placed near relevant structures․ Use color-coding to differentiate between axial and appendicular bones for better visual distinction․ Include answer keys for self-assessment and consider adding surface markings for advanced learners․ Begin with major bones like the skull, ribcage, and femur before moving to smaller ones․ Provide instructions in anatomical terminology to enhance learning․ Reference reliable anatomical sources to ensure accuracy․ Finally, encourage students to test themselves after studying, reinforcing retention of bone names and locations․
Common Mistakes to Avoid in Skeletal Labeling

When labeling the skeleton, common mistakes include mixing up similar bones, such as the radius and ulna or tibia and fibula․ Students often mislabel small bones, like carpals or tarsals, due to their complexity․ Forgetting to label all parts of the skull, especially facial bones, is another frequent error․ Additionally, incorrect use of anatomical terminology can lead to confusion․ Reversing labels, particularly in bilateral structures, is a common oversight․ Ignoring surface markings on bones, such as foramen or condyles, can hinder understanding of their functions․ To avoid these mistakes, students should study bone shapes and terminology carefully and cross-reference diagrams with answer keys․ Regular practice and attention to detail are essential for accurate labeling․